The Story of my HF Tower at my Former Kampeska QTH
This project was several years in the making. It really started with a sad event, the closing of Burghardt Amateur Center sales. (Thank goodness
Burghardt Radio Repair
is still in business) I bought the tower and antenna as part of their going out of the sales business sale. Purchasing the tower and antenna depleted my amateur radio funds for the year (okay a couple years). The tower is a
Rohn HDBX-48
and the antenna is
Traffie Hexbeam.
These pages are not to be construed as instructions on how to do this. It is simply a record of what I did. If you do someting similar and it fails I accept no responsibility!
I guess the best move is to start from the beginning:
If the pictures seem out of order they are in the order that events took place. Your mileage may vary! I figured I would do it as close to "by the book" as possible with the idea of quality over speed - keeping budget as a prime consideration. In other words I hoped to do it right, and never have to do it over.
Rohn provides a drawing on what the base should consist of. It isn't real clear on a couple things, but I tried to follow it best I could - as they say on the Tower Talk email reflector "follow the prime directive" (ie do what the manufacturer says).
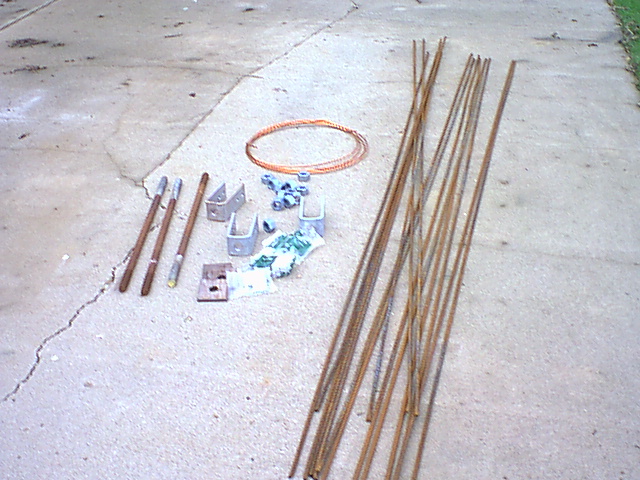


Above is the base hardware along with everything that goes in the hole. Please be sure to wear your Presonal Protective Equipment when cutting the steel! I found the small angle grinder made cutting the steel very easy.
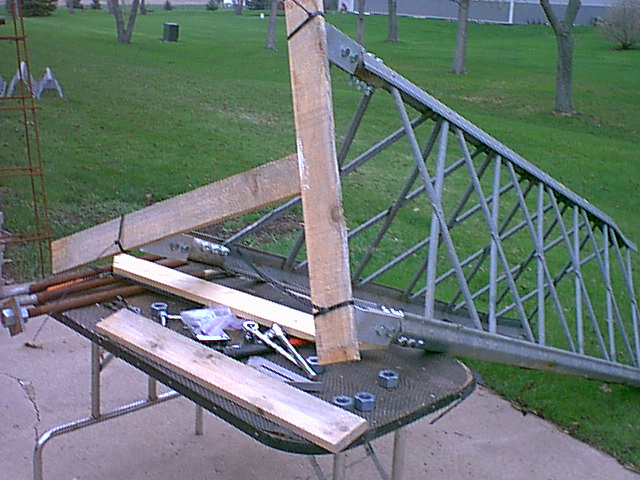
This is probably where I made my biggest mistake, and I hope you can learn from the error of my ways. The picture shown is not the solution I used, but it is similar. Anyway, you will do better. This is how I made a template to hold the bolts in the correct place. I should have made it out of stiffer stuff. Another solution would be to suspend the whole bottom section over the hole. Bear with me, this will all make sense.

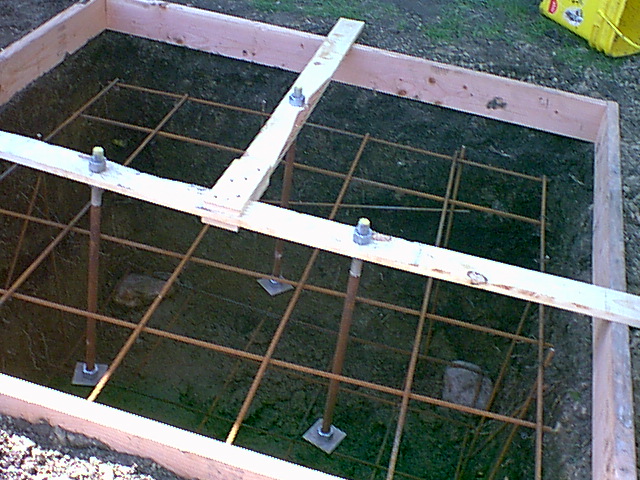
Here is the hole. That is a 4 foot level completely inside the hole. Yes, I dug it by hand in a day. I am a fat lazy middle aged guy who could not afford a backhoe. It is very square. The forms are made of 2"x6" lumber. I leveled the forms to be sloped away from the house just a tiny bit. Next to the empty hole picture you can see the hole with the steel in it and bolts suspended using the template (see the sag). You may notice later that I raised the template before pouring the concrete. Note the steel is setting on piers (big rocks) to keep it from touching the sides/bottom of the hole. The object is to completely encase the steel in concrete.
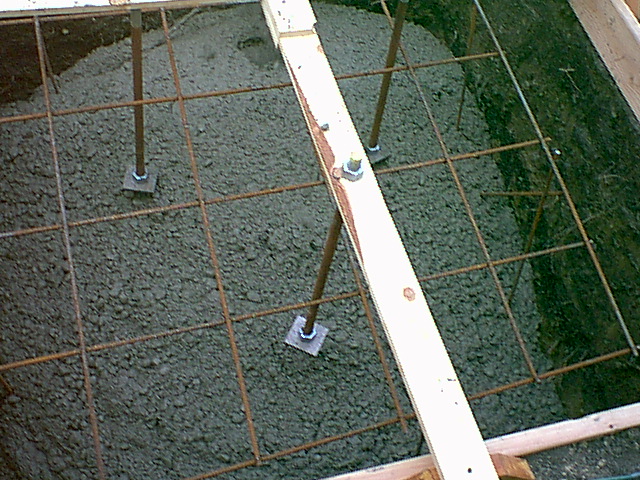
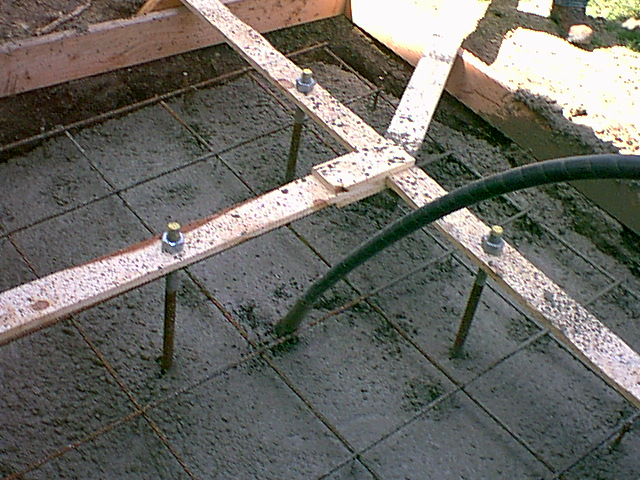
The concrete is going in. I did have a truck come out to provide the 5+ yards of concrete. I priced it out and it didn't cost anymore than mixing it myself, which I didn't think I was up to anyway! I was sure to get a continous pour as well. Be sure to keep the bolts verticle (upright) as the concrete pours in. I rented a concrete vibrator to work the bubbles out and move the concrete around. Spend the money to rent a concrete vibrator - you need this tool to do it right. It just makes the concrete flow where you want it. Also note the template has been elevated to hold the bolts a little higher out of the concrete.
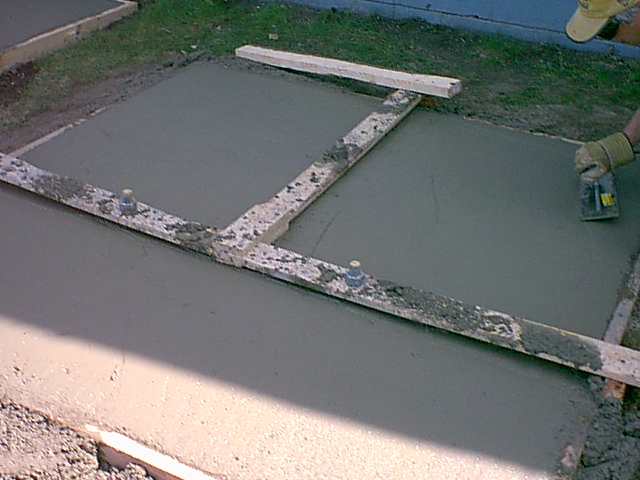
Now that the concrete is in I needed to trowel the surface, and then about an hour later, I "broomed" the surface to get the final finish. That's my friend Dave Schilder (not yet a ham) in the picture. I tried to do as much as possible by myself, but I did call Dave for help on concrete day (he was awesome), and brought in a lot of help on tower day.
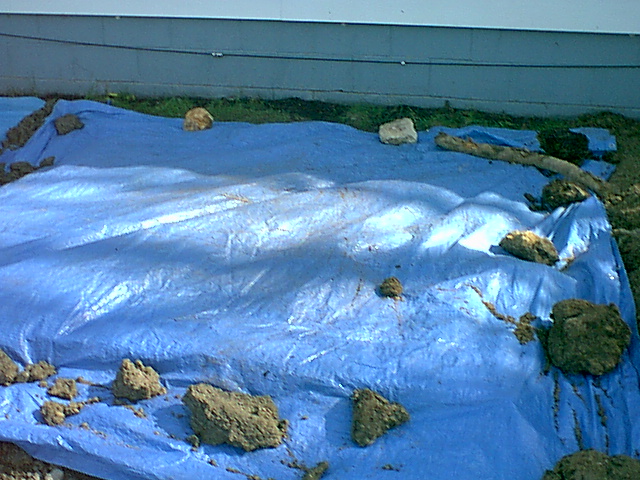
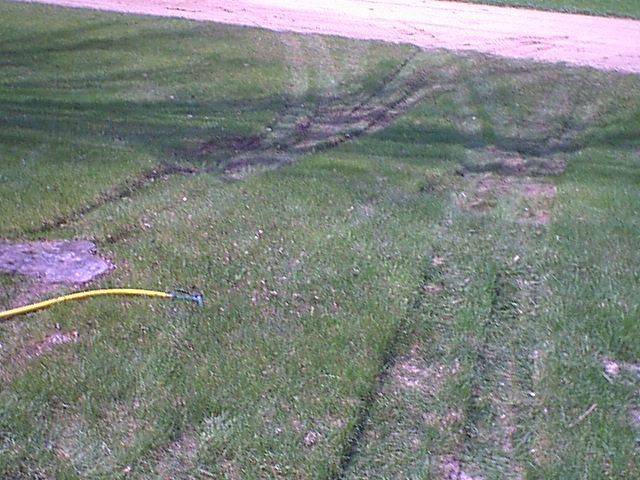
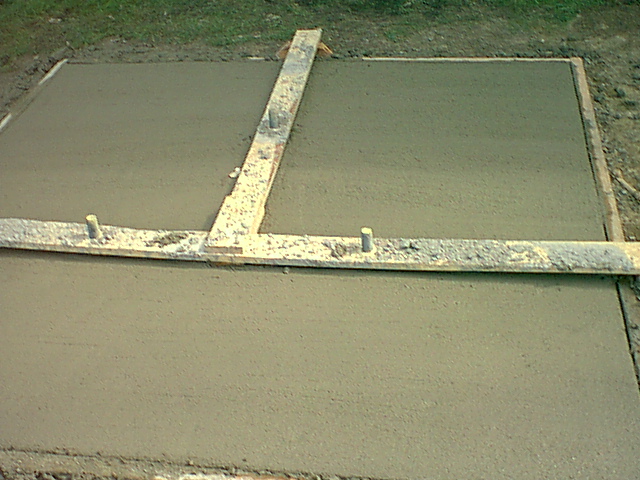
After brooming the concrete and finishing the edges, I sprayed a very small amount of water on it and covered it for a couple of days. This is a good time to deal with the ruts left by the concrete truck.
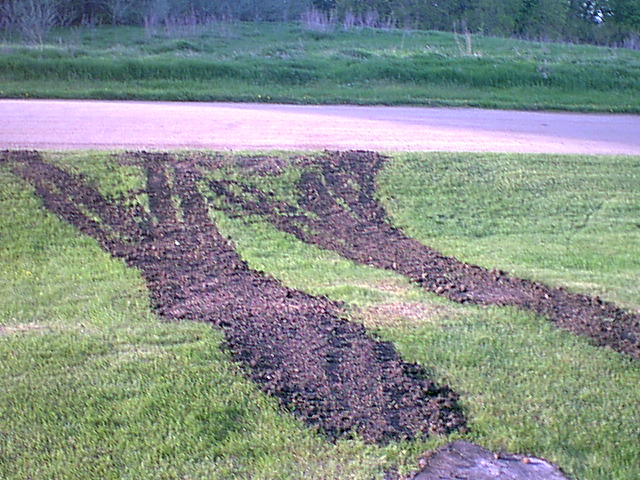
Fortunately, I had plenty of dirt to fill in the ruts.


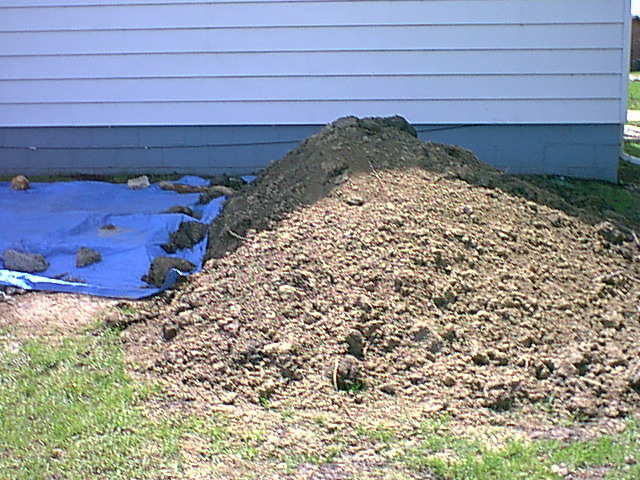
There still was a lot of dirt left, I filled in every hole I could find, and used a little of the dirt when I removed the forms as shown here. I still wound up just spreading some around some low spots. This was more work and took more time than I expected. Be prepared to deal with your dirt. Then I recovered the concrete and left it for a month.
Next Page
Home